Install PowerFlex on Already-Prepared PFMP Nodes
This document provides the installation guide for using Dell/EMC PowerFlex4 as a storage backend on the Burrito platform.
There are two platforms in Dell/EMC PowerFlex. The first platform is PowerFlex Storage Platform which serves as a core storage service. I’ll call it PFSP. The second platform is PowerFlex Management Platform which serves as API and monitoring services. I’ll call it PFMP.
I will show you how to install PFSP with Burrito. PFSP will be installed in HCI (HyperConverged Infrastructure) mode on the Burrito platform.
I assume 4 PFMP nodes are already created somewhere - 1 pfmp-installer node and 3 pfmp-mvm nodes. These could be either physical or virtual machines. This guide will show you how to install PFMP on these nodes.
Reference hardware spec.
This is the minimum hardware spec. for three PFSP nodes.
hostname |
CPU (ea) |
Memory (GB) |
Disk (GB) |
Extra Disks |
|---|---|---|---|---|
pfx-1 |
8 |
16 |
100 |
100GB * 3 ea |
pfx-2 |
8 |
16 |
50 |
100GB * 3 ea |
pfx-3 |
8 |
16 |
50 |
100GB * 3 ea |
Those extra disks will be used by PowerFlex SDS.
Here is the minimum hardware spec. for each PFMP node.
node name |
CPU (ea) |
Memory (GB) |
Disk (GB) |
|---|---|---|---|
pfmp-installer |
4 |
8 |
100 |
pfmp-mvm1 |
8 |
24 |
150 |
pfmp-mvm2 |
8 |
24 |
150 |
pfmp-mvm3 |
8 |
24 |
150 |
Networks
This is a network information used in this document.
hostname |
service |
management |
provider |
overlay |
storage |
|---|---|---|---|---|---|
. |
eth0 |
eth1 |
eth2 |
eth3 |
eth4 |
. |
192.168.20. |
192.168.21. |
192.168.22. |
192.168.23. |
192.168.24. |
pfx-1 |
71 |
71 |
no ip |
71 |
71 |
pfx-2 |
72 |
72 |
no ip |
72 |
72 |
pfx-3 |
73 |
73 |
no ip |
73 |
73 |
pfmp-installer |
N/A |
75 |
N/A |
N/A |
N/A |
pfmp-mvm1 |
N/A |
76 |
N/A |
N/A |
76 |
pfmp-mvm2 |
N/A |
77 |
N/A |
N/A |
77 |
pfmp-mvm3 |
N/A |
78 |
N/A |
N/A |
78 |
KeepAlived VIP on management interface: 192.168.21.70
KeepAlived VIP on service interface: 192.168.20.70
PFSP MDM VIP on storage interface: 192.168.24.70
LoadBalancer IP address pool on PFMP: 3 IP addresses are needed on management and storage network.
LoadBalancer IP address pool on management: 192.168.21.79 - 192.168.21.81
LoadBalancer IP address pool on storage: 192.168.24.79 - 192.168.24.81
N/A means that the machine does not require the interface.
pfmp-installer node only needs the management IP address.
pfmp-mvm nodes need the management and storage IP addresses.
When you prepare for the burrito installation with PowerFlex, Fill in the above network information for your network environment.
Pre-requisite for PFMP
You should put the following files in the first control plane node (clex@pfx-1:~/images/) directory.
pfmp.tgz
PFMP installation tarball (Contact your Dell representative to get this file.)
File size: 25 GiB
When you get this file from Dell, the filename will be something like PFMP2-4.6.1.0-715.tgz. Rename it to pfmp.tgz.
File list:
[clex@pfx-1 ~]$ ls -lh images/
total 25G
-rw-r--r-- 1 clex clex  25G Mar 11 16:38 pfmp.tgz
Warning
Never proceed to the next step until you’ve met this PFMP pre-requisite.
Install
I’ll assume this is the offline installation.
Pre-requisites
OS is installed using Burrito ISO.
The first node in control group is the ansible deployer.
Ansible user in every node has a sudo privilege. I assume the ansible user is clex in this document.
All nodes should be in /etc/hosts on the deployer node.
Here is the example of /etc/hosts on the deployer node.:
192.168.21.71 pfx-1
192.168.21.72 pfx-2
192.168.21.73 pfx-3
192.168.21.75 pfmp-installer
192.168.21.76 pfmp-mvm1
192.168.21.77 pfmp-mvm2
192.168.21.78 pfmp-mvm3
Prepare
Mount the iso file.:
$ sudo mount -o loop,ro <path/to/burrito_iso_file> /mnt
Check the burrito tarball in /mnt.:
$ ls /mnt/burrito-*.tar.gz
/mnt/burrito-<version>.tar.gz
Untar the burrito tarball to user’s home directory.:
$ tar xzf /mnt/burrito-<version>.tar.gz
Run prepare.sh script with offline flag.:
$ cd burrito-<version>
$ ./prepare.sh offline
Enter management network interface name: eth1
...
It will prompt for the management network interface name. Enter the management network interface name. (e.g. eth1)
inventory hosts and variables
Copy hosts_powerflex_with_pfmp_nodes.sample to hosts.:
$ cp hosts_powerflex_with_pfmp_nodes.sample hosts
Edit hosts.:
pfx-1 ip=192.168.21.71 ansible_connection=local ansible_python_interpreter=/usr/bin/python3
pfx-2 ip=192.168.21.72
pfx-3 ip=192.168.21.73
pfmp-installer ip=192.168.21.75
pfmp-mvm1 ip=192.168.21.76
pfmp-mvm2 ip=192.168.21.77
pfmp-mvm3 ip=192.168.21.78

# ceph nodes
[mons]
[mgrs]
[osds]
[rgws]
[clients]

# powerflex nodes
[mdm]
pfx-[1:3]

[sds]
pfx-[1:3]

[sdc]
pfx-[1:3]

[pfmp]

[pfmp_installer]
pfmp-installer

[pfmp_mvm]
pfmp-mvm[1:3]

# kubernetes nodes
[kube_control_plane]
pfx-[1:3]

[kube_node]
pfx-[1:3]

# openstack nodes
[controller-node]
pfx-[1:3]

[network-node]
pfx-[1:3]

[compute-node]
pfx-[1:3]

###################################################
## Do not touch below if you are not an expert!!! #
###################################################
The pfmp group is empty since it is for a single PFMP node. On the other hand, there are hosts in pfmp_installer and pfmp_mvm groups.
Edit vars.yml.:
### define network interface names
# set overlay_iface_name to null if you do not want to set up overlay network.
# then, only provider network will be set up.
svc_iface_name: eth0
mgmt_iface_name: eth1
provider_iface_name: eth2
overlay_iface_name: eth3
storage_iface_name: eth4

### ntp
# Specify time servers for control nodes.
# You can use the default ntp.org servers or time servers in your network.
# If servers are offline and there is no time server in your network,
#   set ntp_servers to empty list.
#   Then, the control nodes will be the ntp servers for other nodes.
ntp_servers: []

### keepalived VIP on management network (mandatory)
keepalived_vip: "192.168.21.70"
# keepalived VIP on service network (optional)
# Set this if you do not have a direct access to management network
# so you need to access horizon dashboard through service network.
keepalived_vip_svc: "192.168.20.70"

### metallb
# To use metallb LoadBalancer, set this to true
metallb_enabled: true
# set up MetalLB LoadBalancer IP range or cidr notation
# IP range: 192.168.20.95-192.168.20.98 (4 IPs can be assigned.)
# CIDR: 192.168.20.128/26 (192.168.20.128 - 191 can be assigned.)
# Only one IP: 192.168.20.95/32
metallb_ip_range: "192.168.20.69/32"

### storage
# storage backends
# If there are multiple backends, the first one is the default backend.
# Warning) Never use lvm backend for production service!!!
# lvm backend is for test or demo only.
# lvm backend cannot be used as a primary backend
#   since we does not support it for k8s storageclass yet.
# lvm backend is only used by openstack cinder volume.
storage_backends:
  - powerflex

# ceph: set ceph configuration in group_vars/all/ceph_vars.yml
# netapp: set netapp configuration in group_vars/all/netapp_vars.yml
# powerflex: set powerflex configuration in group_vars/all/powerflex_vars.yml
# hitachi: set hitachi configuration in group_vars/all/hitachi_vars.yml
# primera: set HP primera configuration in group_vars/all/primera_vars.yml
# lvm: set LVM configuration in group_vars/all/lvm_vars.yml
# purestorage: set Pure Storage configuration in group_vars/all/purestorage_vars.yml
# powerstore: set PowerStore configuration in group_vars/all/powerstore_vars.yml

###################################################
## Do not edit below if you are not an expert!!!  #
###################################################
Edit group_vars/all/powerflex_vars.yml.:
# MDM VIPs on storage networks
mdm_ip:
  - "192.168.24.70"
storage_iface_names:
  - eth4
sds_devices:
  - /dev/sdb
  - /dev/sdc
  - /dev/sdd
## PowerFlex Management Platform info
# pfmp_ip is the ip address of the first pfmp LB ip pool.
pfmp_ip: "192.168.21.79"
pfmp_hostname: "pfmp.cluster.local"
pfmp_port: 443
pfmp_username: "admin"
pfmp_password: "<PFMP_ADMIN_PASSWORD>"

#
# Do Not Edit below
#
The mdm_ip is the VIP of PowerFlex MDM cluster.
The pfmp_ip is the first IP address in PFMP LoadBalancer management pool.
The pfmp_hostname is the PFMP hostname which is used when you connect to PFMP UI with your browser.
The pfmp_password is the PFMP admin password you will set after finishing PFMP installation. The password policy is the combination of alphanumeric including uppercase and lowercase letters, and special characters.
Create a vault secret file
Create a vault file to encrypt passwords.:
$ ./run.sh vault
clex password:
openstack admin password:
Encryption successful
Enter clex password for ssh connection to other nodes.
Enter openstack admin password which will be used when you connect to openstack horizon dashboard.
Check the connectivity
Check the connections to other nodes.:
$ ./run.sh ping
It should show SUCCESS on all nodes.
Install
There should be no failed tasks in PLAY RECAP on each playbook run.
Each step has a verification process, so be sure to verify before proceeding to the next step.
Verification processes are not shown in this document. See The Offline Installation document for a verification process in each step.
Warning
Never proceed to the next step if the verification fails.
Step.1 Preflight
Run a preflight playbook.:
$ ./run.sh preflight
Step.2 HA
Run a HA stack playbook.:
$ ./run.sh ha
Step.3 PowerFlex PFMP
Install PFMP on the already prepared nodes (pfmp-installer, pfmp-mvm{1,2,3}).
Run a powerflex_pfmp playbook.:
$ ./run.sh powerflex_pfmp
Go to pfmp-installer:/opt/dell/pfmp/PFMP_Installer/scripts.:
[clex@pfx-1 ~]$ ssh pfmp-installer
Last login: Tue Mar 11 16:51:51 2025 from 192.168.21.79
[clex@pfmp-installer ~]$ cd /opt/dell/pfmp/PFMP_Installer/scripts
Run setup_installer.sh script.:
[clex@pfmp-installer scripts]$ ./setup_installer.sh
RUN_PARALLEL_DEPLOYMENTS is not set.
RUN_PARALLEL_DEPLOYMENTS is set to: false

Running Single Deployment flow mode
No running Atlantic Installer container found.
No running PFMP Installer container found.
No instl_nw found.
pfmp_installer_nw
Loading Atlantic Installer container from : /opt/dell/pfmp
...
Loaded image: asdrepo.isus.emc.com:9042/atlantic_installer:33-0.0.1-260.d1907f2
e2e9b1d5e9c9c57f43a8aba3474c68e6e2ea9a7de50c24b52a64dfdac57a29a7
Loading PFMP Installer container from : /opt/dell/pfmp
...
Loaded image: localhost/pfmp_installer:latest
Check the atlantic_installer container is running.:
[clex@pfmp-installer ~]$ sudo podman ps
CONTAINER ID  IMAGE                                                              COMMAND               CREATED       STATUS       PORTS       NAMES
c8788df7a867  asdrepo.isus.emc.com:9042/atlantic_installer:33-0.0.1-260.d1907f2  /bin/sh -c api_pr...  42 hours ago  Up 42 hours              atlantic_installer
Run install_PFMP.sh script.:
[clex@pfmp-installer scripts]$ sudo ./install_PFMP.sh
...
Are ssh keys used for authentication connecting to the cluster nodes[Y]?:n
Please enter the ssh username for the nodes specified in the PFMP_Config.json[root]:clex
Are passwords the same for all the cluster nodes[Y]?:
Please enter the ssh password for the nodes specified in the PFMP_Config.json.
Password:
Are the nodes used for the PFMP cluster, co-res nodes [Y]?:n
...
2025-03-09 07:16:49,740 | INFO | Setting up the cluster
54%|####################################                                       |
It asks a few questions. Answer them as above.
It will take a long time to finish the installation. It creates a kubernetes cluster on pfmp-mvm nodes and installs PFMP application pods on the kubernetes cluster.
You can see the installation logs at pfmp-installer:/opt/dell/pfmp/atlantic/logs/bedrock.log.
Now go back to pfx-1 and continue to install Burrito.
Step.4 Kubernetes
Run a k8s playbook.:
$ ./run.sh k8s
Step.5 Storage
Run a storage playbook.:
$ ./run.sh storage
Step.6 PFMP Importing PFSP
Go back to pfmp-installer and wait until install_PFMP.sh script is finished.
This is the shell output when it’s done.:
[clex@pfmp-installer scripts]$ sudo ./install_PFMP.sh
...
Are ssh keys used for authentication connecting to the cluster nodes[Y]?:n
Please enter the ssh username for the nodes specified in the PFMP_Config.json[root]:clex
Are passwords the same for all the cluster nodes[Y]?:
Please enter the ssh password for the nodes specified in the PFMP_Config.json.
Password:
Are the nodes used for the PFMP cluster, co-res nodes [Y]?:n
...
2025-03-09 07:16:49,740 | INFO | Setting up the cluster
100%|##########################################################################|
2025-03-09 07:55:25,040 | INFO | Deploying the apps
100%|##########################################################################|
2025-03-09 10:07:30,190 | INFO | Trying to connect to node:192.168.21.76
2025-03-09 10:07:32,153 | INFO | UI can be accessed at:pfmp.cluster.local which needs to be resolved to 192.168.21.79
2025-03-09 10:07:32,153 | INFO | Deployed the cluster and applications.
[clex@pfmp-installer scripts]$
As it says, UI can be accessed at pfmp.cluster.local which needs to be resolved to 192.168.21.79.
Add pfmp.cluster.local IP address in /etc/hosts on your laptop.:
192.168.21.79 pfmp.cluster.local
Open your browser and go to https://pfmp.cluster.local/. It will give you a warning about security issue since the TLS certificate is a self-signed certificate. Accept the risk and go ahead. Then you will see the PFMP login page.
The ID is admin and the default password is Admin123!. Once you logged in, you will be forced to change the admin password. Change the admin password to pfmp_password value you set up in group_vars/all/powerflex_vars.yml.
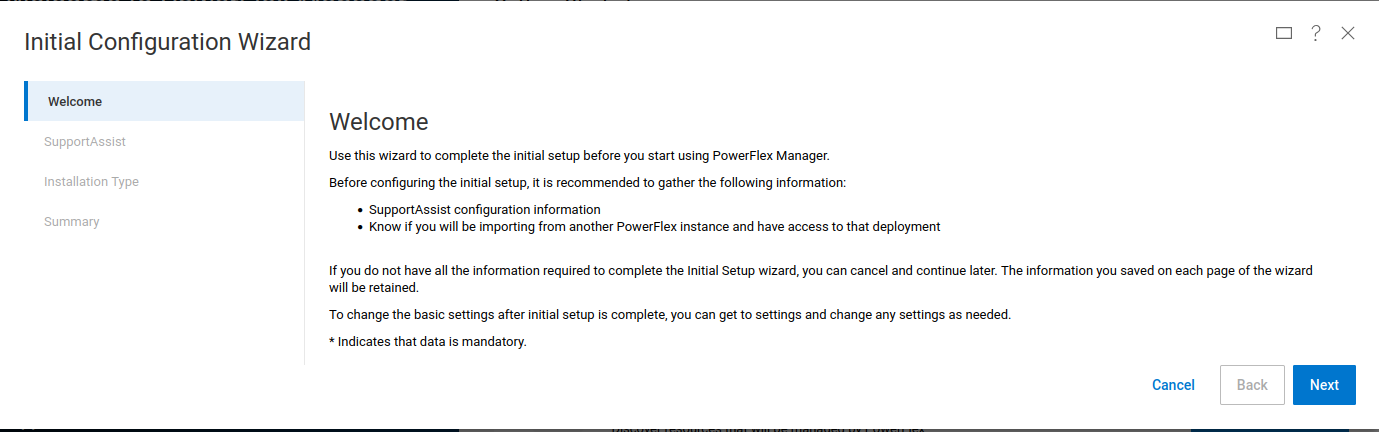
At the first login, you get the welcome page in the Initial Configuration Wizard. just click Next.
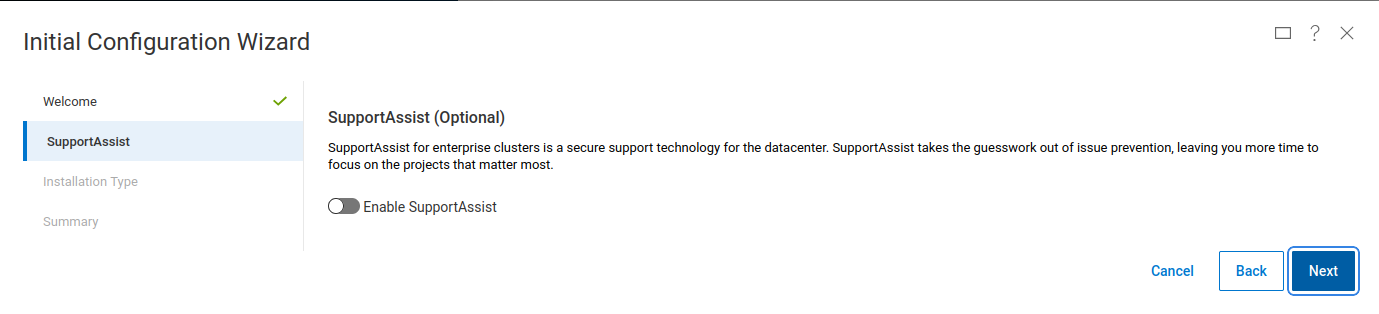
SupportAssist (Optional): Click Next.
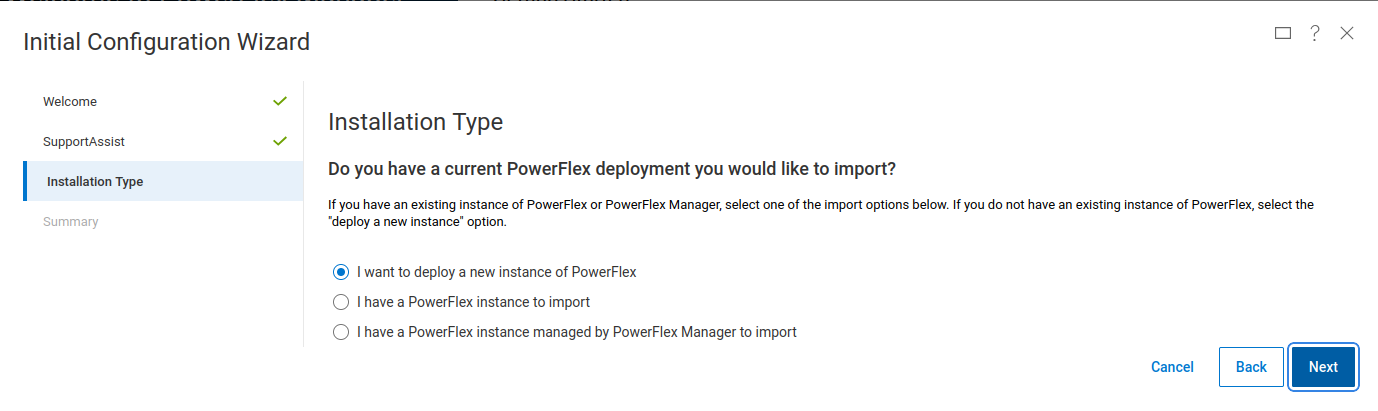
Installation Type: Select “I have a PowerFlex instance to import” and click Next.
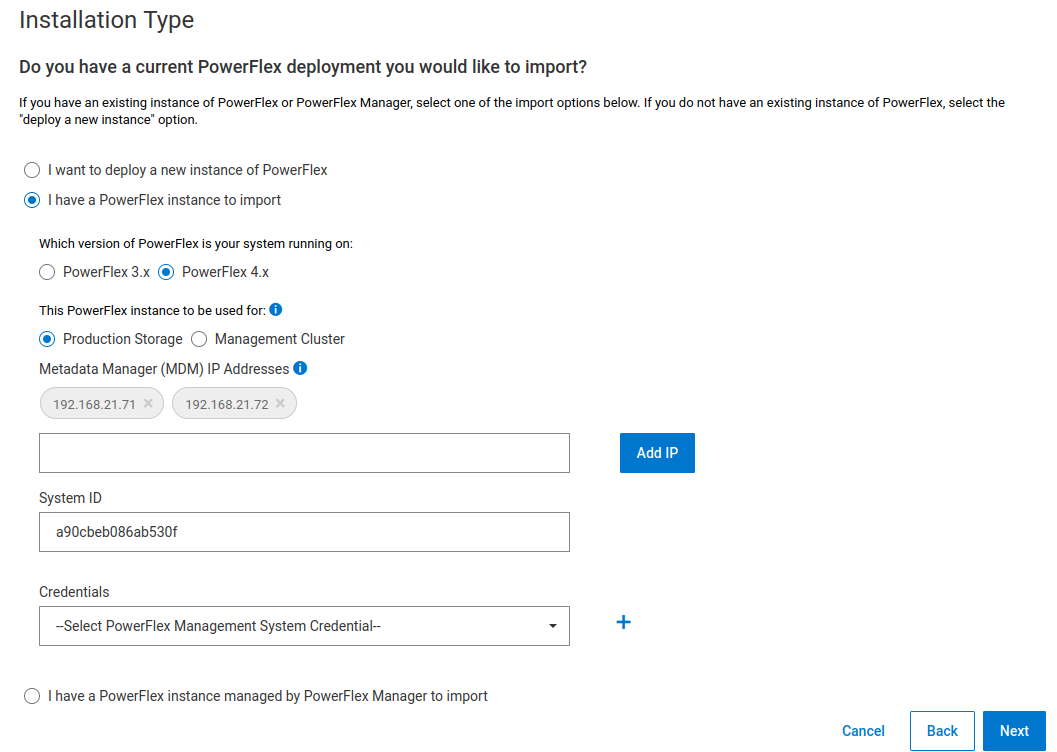
Which version of PowerFlex is your system running on:
Select PowerFlex 4.x
MDM IP Addresses: Enter mdm management ip addresses:
192.168.21.71 -> Add IP
192.168.21.72 -> Add IP
System ID: You can get System ID by running ‘sudo /opt/emc/scaleio/sdc/bin/drv_cfg –query_mdms’:
$ sudo /opt/emc/scaleio/sdc/bin/drv_cfg --query_mdms
Retrieved 1 mdm(s)
MDM-ID 65d20822f2b3420f SDC ID 147f83d700000001 INSTALLATION ID 5e9b0766027ccaed IPs [0]-192.168.24.70
MDM-ID (65d20822f2b3420f) is the System ID. Type your MDM-ID in System ID text box.
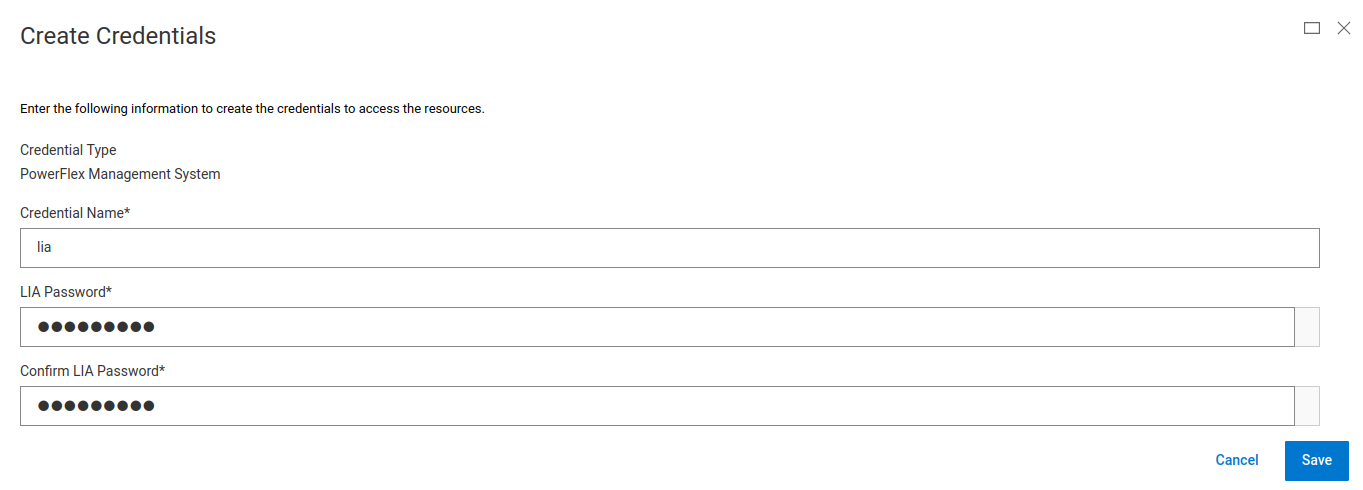
Credentials: Click ‘+’ sign:
Create Credentials

    Credential Name: lia
    LIA Password: <openstack_admin_password>
    Confirm LIA Password: <openstack_admin_password>

'Save'
LIA password is the openstack admin password you typed when you run ‘./run.sh vault’.
Validation
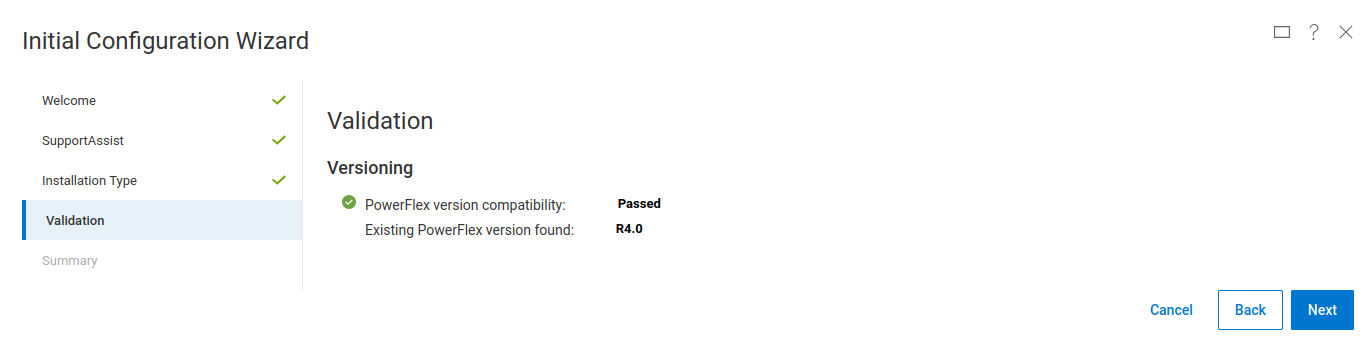
Click Next.
Summary
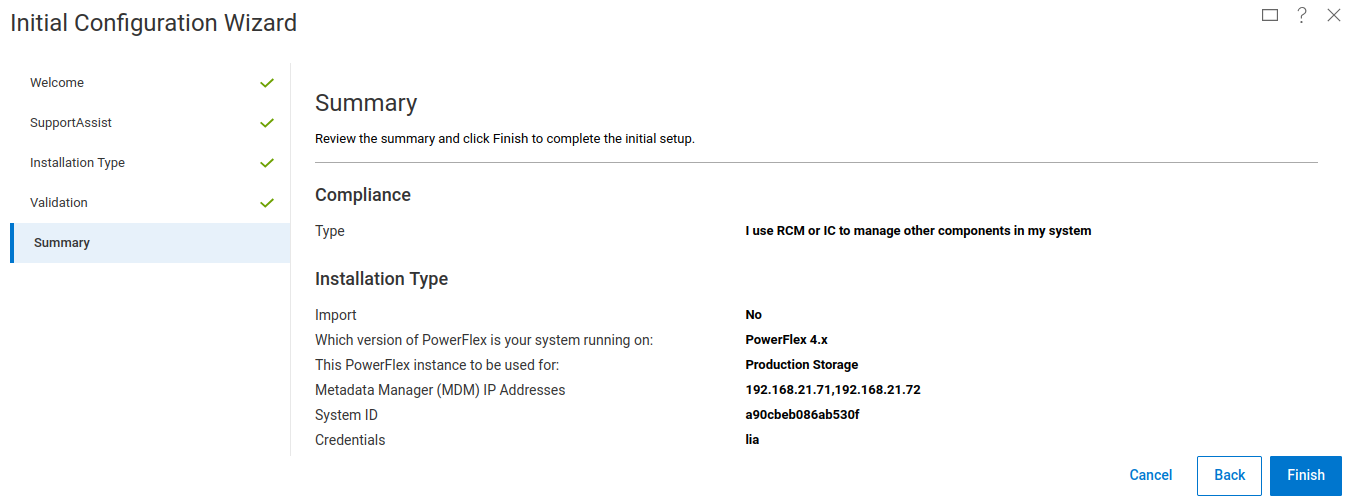
Click Finish.
See Running MGMT Jobs at the top icon. There will be jobs running. It takes about 2-3 minutes.
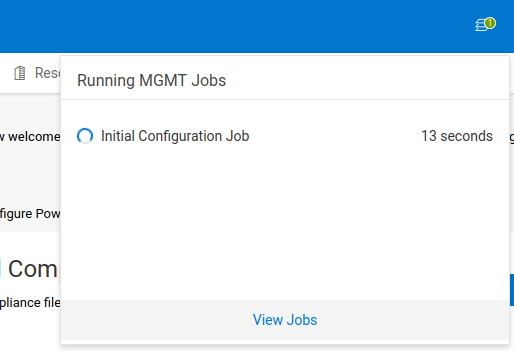

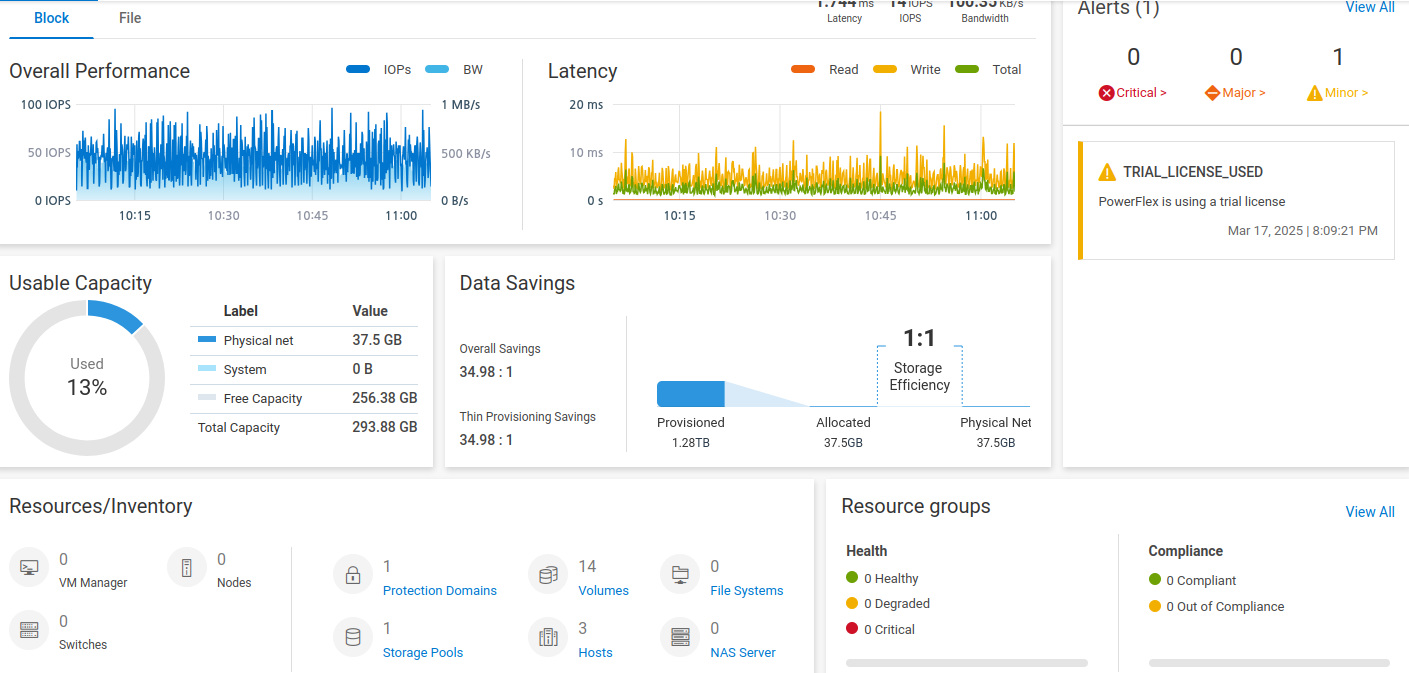
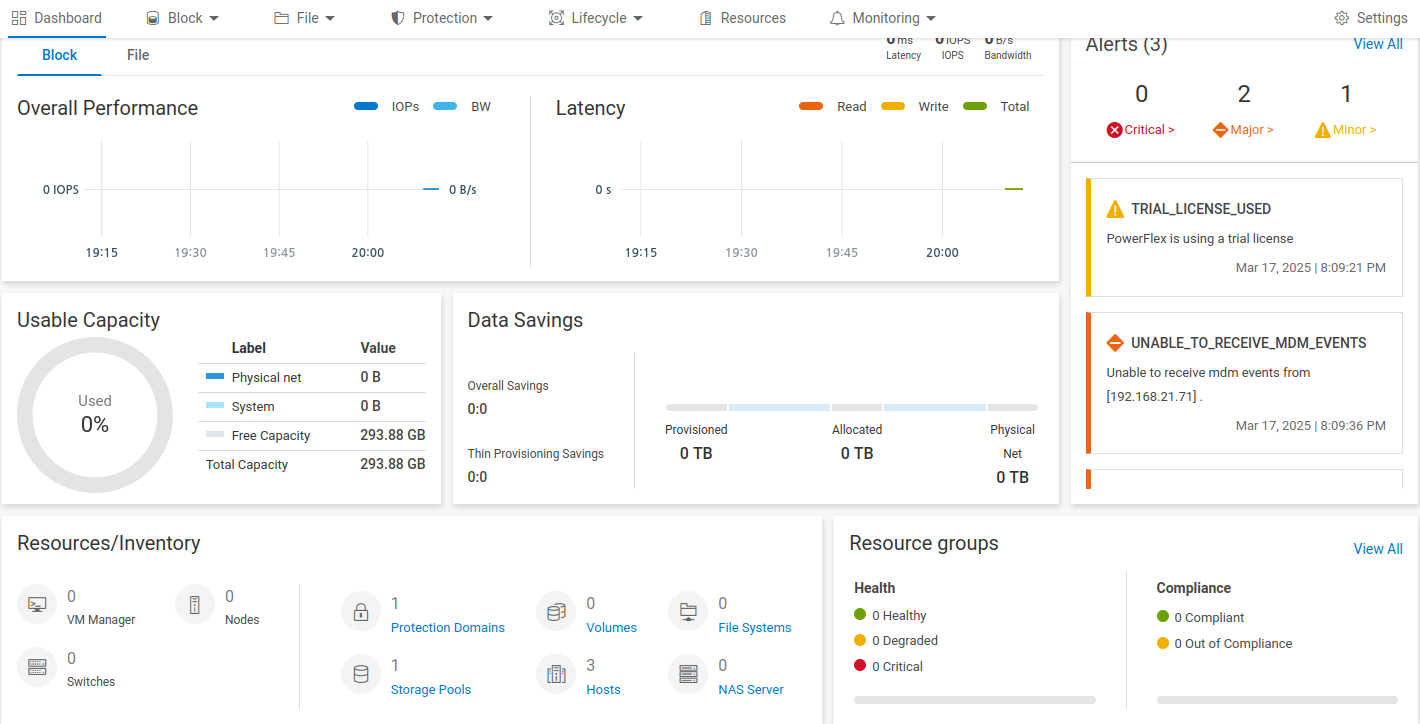
When it is finished, go to the dashboard and you will see the PFSP information (Protection Domains, Storage Pools, Hosts)
Step.7 PowerFlex CSI
Run a powerflex csi playbook.:
$ ./run.sh powerflex_csi
Check if all pods are running and ready in vxflexos namespace.:
$ sudo kubectl get pods -n vxflexos
NAME                                   READY   STATUS    RESTARTS   AGE
vxflexos-controller-744989794d-92bvf   5/5     Running   0          18h
vxflexos-controller-744989794d-gblz2   5/5     Running   0          18h
vxflexos-node-dh55h                    2/2     Running   0          18h
vxflexos-node-k7kpb                    2/2     Running   0          18h
vxflexos-node-tk7hd                    2/2     Running   0          18h
And check if powerflex storageclass is created.:
$ sudo kubectl get storageclass powerflex
NAME                  PROVISIONER                RECLAIMPOLICY   VOLUMEBINDINGMODE      ALLOWVOLUMEEXPANSION   AGE
powerflex (default)   csi-vxflexos.dellemc.com   Delete          WaitForFirstConsumer   true                   20h
From now on, the installation process is the same as The offline installation guide.
Step.8 Patch
Run a patch playbook.:
$ ./run.sh patch
Step.9 Registry
Run a registry playbook.:
$ ./run.sh registry
Step.10 Landing
Run a landing playbook.:
$ ./run.sh landing
Step.11 Burrito (OpenStack)
Run a burrito playbook.:
$ ./run.sh burrito
After you’ve installed all, go back to the PFMP dashboard. You can see some activity on the dashboard.